Seed Starting
Starting seeds indoors is a rewarding gardening experience and can help extend your growing season to include more plant varieties than your outdoor season may permit. Furthermore, a larger selection of seed varieties doesn’t limit your opportunities to grow only those transplants that are available at planting time. The key to success in growing seedlings is in creating the proper environment.
What Seeds Need
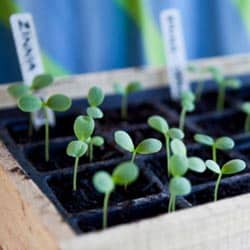
Seeds are generally hardy, but to start them properly, they do need gentle nurturing so they can produce healthy, vibrant plants. In general, seeds should be started 4-6 weeks before the recommended planting time so the seedlings will be large and strong enough to withstand the stresses of transplanting. Use a sterile growing mix that is light enough to encourage rich root growth. Sow the seeds thinly and cover lightly with sphagnum peat moss. Water using a fine spray, but do not soak the seeds; they also need oxygen to germinate, and if they are overwatered, they will drown. Cover the container with clear plastic to hold the moisture and increase humidity. Place the containers in a warm (70-80 degrees) spot and watch daily for germination. The top of the refrigerator is often an ideal location. When the first seeds germinate, place the seedlings in bright light or under artificial lights (tube lights should be 2-3″ from seedling tops) for several hours each day, since late winter sunlight will not usually be sufficient to prevent weak, leggy seedlings. Daytime temperatures should range from 70-75 degrees. Night-time temperatures should range from 60-65 degrees.
As Seeds Grow
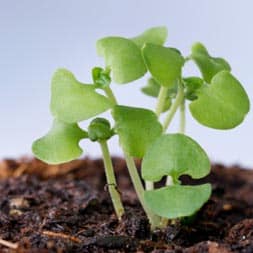
When the seedlings develop their first true sets of leaves, add half-strength water-soluble fertilizer to their water organic fish emulsion or seaweed fertilizers are great to use. Repeat every second week to provide good nourishment. Thin the seedlings or transplant them to larger containers as they grow. Before planting outdoors, harden off the plants at least one week before the planting date. Take the transplants outdoors in the daytime and bring them in at night if frost is likely. Gradually expose them to lower temperatures and more sunlight. The use of hotcaps and frost blankets to cover early plantings will also aid in the hardening-off process so the seedlings can adjust well to their new outdoor environment.
Transplanting Seeds
Transplant seedlings into the garden after the safe planting date on a calm, overcast day. Pack the soil around the transplant with as little root disturbance as possible. Sprinkle the plants with water, keeping the soil moist until the plants become established.
Popular Indoor Seed Start Dates
The exact dates you want to start seeds will vary depending on your local growing season, the varieties of plants you choose and what their needs are. In general, dates for the most popular produce include:
Vegetable Seed Starting Dates
- February: Asparagus, celery, onion
- March 1: Broccoli, Brussels sprouts, cabbage, cauliflower, collards, kale, lettuce
- March 15: Eggplant, peppers, tomatoes
- April 1: Summer squash
- April 15: Cantaloupes, cucumbers, winter squash
Flower Seed Starting Dates
- January/February: Begonia, carnation, geranium, impatiens, nicotiana, pansy, rudbeckia, salvia, snapdragon, verbena, vinca
- March 1: Ageratum, dahlia, dianthus, petunia
- April 15: Aster, calendula, celosia, marigold, zinnia
Use seed starting dates as a general guide to ensure your seeds have plenty of time to reach their full harvest potential before the weather turns in autumn. At the same time, consider staggering seed starting every few days to lengthen your harvest and keep your favorite vegetables and flowers coming even longer during the growing season. As you gain more experience with starting seeds, you’ll be able to carefully plan your seed calendar to ensure a lush, rich, long harvest season.


